Kyle Weiger
Share This
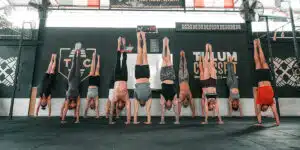
How Long Should My Practice Be? The Optimal Handstand Training Session Length For Beginners
“What is the ideal handstand training session length to get the most out of my practice?”
Some people think 10 minutes is enough. Others grind for 2 hours thinking more is always better. The truth is that the optimal handstand training session length is somewhere in between, and the answer depends on what you’re actually trying to accomplish in each session.
After a decade of coaching and refining my own practice, I’ve found that most students get the best results from 60-75 minute structured sessions that include proper warm-up, focused skill work, freestanding practice, conditioning, and cool-down.
This isn’t random. Each component serves a specific purpose, and the total duration allows for quality practice without fatigue that degrades technique.
Let me break down exactly what an effective handstand session looks like and why each piece matters.
The Problem With “Just Practice Until You’re Tired”
Most beginners approach handstand practice with no structure. They show up, kick against the wall a bunch of times, maybe do some freestanding attempts, and call it a day when they’re exhausted.
This approach has several problems:
No warm-up means higher injury risk. Cold tissues (especially wrists) loaded with your full bodyweight is a recipe for strains and chronic pain.
No structure means no progressive skill development. You’re just doing random things instead of systematically building the components that create a handstand.
Training to exhaustion degrades form. Your last 20 minutes of practice when you’re fatigued is just reinforcing sloppy technique. You’re not building skill at that point. You’re building bad habits.
No cool-down means reduced recovery. You’re leaving adaptation on the table by not facilitating the recovery process.
A well-structured handstand training session length with appropriate duration addresses all of these issues.
The Ideal Session Structure: 60-75 Minutes Total
Here’s what an optimal handstand training session looks like, broken into components.
GET THE DOWNLOADABLE PDF HERE!
Component 1: Warm-Up (15 Minutes)
This is non-negotiable. Your body needs preparation before you ask it to support your full weight on your hands overhead.
Wrist preparation (5 minutes):
- Wrist circles in both directions
- Flexion and extension stretches
- Gentle weight-bearing in tabletop position
- Progressive loading to prepare joints for heavier work
Shoulder activation (4 minutes):
- Scapular pushups to activate stabilizers
- Wall slides to open overhead range
- Arm circles to warm up rotator cuff
- Light resistance band work for posterior shoulder
Hip and hamstring mobility (4 minutes):
- Hip circles and leg swings
- Light hamstring stretches
- Hip flexor activation
- Movement that gets blood flowing to lower body
Core activation (2 minutes):
- Hollow body holds
- Planks with posterior pelvic tilt
- Dead bugs or similar core engagement
This warm-up accomplishes several critical things. It prepares your wrists for load (preventing the #1 injury in handstand training), and activates the shoulder stabilizers you need for proper positioning. You also open up ranges of motion that allow better alignment, and you switch on your core so it’s ready to engage when you’re inverted.
Skipping warm-up to “save time” is false economy. You’re trading 15 minutes for increased injury risk and decreased performance throughout the session.
Component 2: Wall Holds (5-8 Minutes, 2-3 Sets)
After warming up, you don’t immediately jump into skill work. You ease into the inverted position with controlled wall holds.
Back-to-wall holds (2-3 sets of 30-60 seconds):
- Controlled entry, minimal wall contact
- Focus on proper alignment (shoulders elevated, ribs down, straight line)
- Active engagement, not passive hanging
- Rest 60-90 seconds between sets
This serves multiple purposes. It continues the warm-up process but now in the actual handstand position, and it reinforces proper alignment and positioning before you move to more challenging work. It builds time under tension that develops the endurance you need for longer holds.
Think of this as your “activation sets” before the real work begins.
Component 3: Focused Drill Work at the Wall (20-30 Minutes)
This is the meat of your session where you work on specific skills, progressions, and technical elements.
What this looks like:
If you’re following structured programming (like my 4 Essential Elements course or 8 Week Freestanding Protocol), you have specific drills assigned for each session. These might include:
- Chest-to-wall holds for alignment work
- Shoulder taps for stability
- Weight shifting drills for balance awareness
- Heel pulls for proprioceptive training
- Endurance holds building toward specific time targets
- Entry practice for control and consistency
The key is that you’re not just randomly doing wall handstands. You’re working on specific technical elements with clear purpose.
How to structure this time:
Work in sets with adequate rest. For example: 30 seconds of drill work, 60 seconds rest, repeat for 4-6 sets. Or longer holds (45-60 seconds) with 2-3 minutes rest between.
The rest is not wasted time. That’s when your nervous system processes what you just practiced and prepares for the next quality set.
Quality over quantity. 20 minutes of focused, intentional drill work with proper rest beats 40 minutes of grinding yourself into the ground with degrading form.
If you don’t have structured programming, you’re guessing at what to work on. This is where having a system (like the courses I mentioned) makes a massive difference in progress rate.
Component 4: Freestanding “Play Time” (10-15 Minutes)
After your structured wall work, you shift to freestanding practice. I call this “play time” because it should feel exploratory and low-pressure, not like grinding for PRs.
What this includes:
Freestanding balance attempts (5-10 quality attempts, focusing on controlled entries). Brief holds where you’re feeling for the balance point. Exploring different entry methods. Trying variations (different leg positions, hand placements). Working on exits and transitions. Allowing yourself to experiment without pressure.
This is where balance actually develops. The wall work built strength and alignment. Now you’re applying that in freestanding context where balance is actually required.
Why only 10-15 minutes?
Because quality freestanding attempts require focus and freshness. After 15 minutes, most students are mentally fatigued and their attempts become sloppy. Better to do 10 minutes of quality attempts than 30 minutes of increasingly terrible kick-ups.
Also, freestanding work is neurologically demanding. It’s taxing on your nervous system in a different way than wall holds. Keeping this portion contained prevents neural fatigue that would compromise the rest of your session.
Component 5: Conditioning Work (5-8 Minutes)
After your skill work, you add targeted conditioning that builds the specific strength qualities handstands require.
Examples of conditioning work:
Pike pushups (3 sets of 8-12 reps). Hollow body holds (3 sets of 20-40 seconds). Compression work (tucked holds, L-sits). Scapular strengthening exercises. Core anti-extension work. Wrist strengthening protocols.
This isn’t about getting a “workout.” It’s about building the strength foundation that supports continued skill development.
Why at the end of the session?
Because this work is fatiguing, and you don’t want to be fatigued during skill practice. You do your skill work fresh, then add conditioning at the end when form degradation in these exercises is less critical.
Component 6: Cool-Down and Stretching (5-10 Minutes)
The final component that most people skip but shouldn’t.
What this includes:
Wrist stretches and releases (reversing all the extension work you did). Shoulder stretches focusing on flexibility and recovery. Hip and hamstring stretches. Light core work or gentle movement. Breathing and nervous system downregulation.
This serves multiple purposes. It starts the recovery process immediately and helps prevent tightness and soreness in the tissues you just loaded heavily. It signals to your nervous system that the stress period is over and it’s time to shift into recovery mode.
Five minutes here can significantly impact how you feel the next day.
Why This Structure Works
Each component builds on the previous one:
Warm-up prepares your body for load. Wall activation sets ease you into the inverted position. Focused drill work develops specific skills and strength. Freestanding practice applies those skills in balance context. Conditioning builds underlying physical qualities. Cool-down facilitates recovery.
The total duration (60-75 minutes) is long enough to accomplish meaningful work across all these areas, but short enough that you’re not grinding yourself into chronic fatigue.
What About Shorter Sessions?
“Kyle, I don’t have 75 minutes. Can I train in 30 minutes?”
Yes, but you need to adjust expectations and priorities if you’re going to shorten your handstand training session length to below 45 minutes.
For a 30-minute session:
Warm-up: 10 minutes (condensed but still non-negotiable). Wall work OR freestanding practice: 15 minutes (pick one focus). Cool-down: 5 minutes (abbreviated but still important).
You’re cutting out some components, which means slower progress. But 30 minutes done consistently is better than 75 minutes done sporadically.
For a 45-minute session:
Warm-up: 12 minutes. Wall work: 15 minutes. Freestanding practice: 10 minutes. Cool-down: 8 minutes (skip conditioning on these days).
This is more realistic for many people’s schedules and still allows for quality practice across multiple components.
The key is maintaining the structure even in shorter sessions. Don’t skip warm-up. Don’t skip cool-down. Just condense the middle portions.
What About Longer Sessions?
“What if I want to train for 90 minutes or 2 hours?”
You can, but be careful about fatigue and diminishing returns.
After about 75 minutes of handstand-specific work, most students hit neural fatigue. Their balance gets worse, not better. Their form degrades. They’re no longer building skill. They’re just accumulating junk volume.
If you’re going to train longer, structure it differently:
60-75 minutes of handstand work as outlined above. 20-30 minute break (hydrate, rest, reset). Second shorter session focused on a specific element (maybe additional mobility work, or supplementary strength training, or skill exploration).
Essentially, you’re doing two sessions with a break in between, not one massive grind session.
For most students, more frequent 60-75 minute sessions beat occasional marathon 2-hour sessions. Frequency matters more than duration for skill development.
Adjusting Duration by Skill Level
Beginners (First 3-6 Months)
Recommended session length: 45-60 minutes
You’re building foundational strength and body awareness. Longer sessions lead to form breakdown because you fatigue quickly.
Focus on: Thorough warm-up (you need this more than advanced students). Quality wall holds with rest. Brief freestanding attempts. Basic conditioning. Adequate cool-down.
Intermediate (6 Months to 2 Years)
Recommended session length: 60-75 minutes
You have the conditioning to sustain longer quality practice. You’re working on balance refinement and endurance, which benefits from the full session structure.
This is where the complete session format I outlined above really shines.
Advanced (2+ Years)
Recommended session length: Variable
Some days might be 45-minute focused sessions on a specific skill. Other days might be 2 hours of comprehensive sessions. You have enough body awareness to know when you’re productive versus just grinding.
The key is staying intentional about what each session is for, not just defaulting to “more is better.”
Signs Your Sessions Are Too Long
Your body will tell you when sessions are exceeding productive duration:
Declining performance within the session. Your 60-minute mark holds are worse than your 20-minute mark holds. You’re fatigued, not building skill.
Chronic soreness that doesn’t resolve. You’re not recovering between sessions because you’re overdoing duration.
Dreading practice. Sessions feel like slogs you have to survive rather than focused practice you look forward to.
Form breakdown. Your last 20 minutes are all sloppy technique and bad habits being reinforced.
If you’re seeing these signs, shorten your sessions. Quality matters infinitely more than duration.
The Bottom Line: Structure + Appropriate Duration = Progress
How long should your handstand training sessions be? 60-75 minutes with proper structure is optimal for most students.
This includes: 15 minutes warm-up, 5-8 minutes wall activation, 20-30 minutes focused drill work, 10-15 minutes freestanding practice, 5-8 minutes conditioning, 5-10 minutes cool-down.
Each component serves a purpose. The total duration allows for meaningful work without fatigue-induced form degradation.
Shorter sessions (30-45 minutes) can work if that’s what your schedule allows, but you’ll progress slower because you’re leaving out components.
Longer sessions (90+ minutes) usually lead to diminishing returns unless you’re structuring them as two separate sessions with a break.
The structure matters more than the exact duration. Find a handstand training session length that works for you. Warm up properly. Practice with focus and intention. Cool down adequately. Repeat consistently.
This is how you build sustainable progress over months and years.
Ready to Train With Proper Structure?
If you want complete session plans that manage warm-up, drill progressions, freestanding practice, and conditioning in the right proportions (not just guessing what to do each day), I’ve built systems specifically for this.
[Check out my 4 Essential Elements course] for comprehensive programming with structured sessions at every level. Level = New Beginner (mainly focused on wall-only drills).
[Or the 8 Week Freestanding Protocol] for focused progression from wall to consistent freestanding holds. Level = Beginner Plus (comfortable kicking in the middle of the room).
Both include the exact session structures, drill progressions, and timing that create results.
Train with structure. Respect the components. Progress consistently.
See you upside down.
PS: Follow me on socials: Instagram, Facebook, TikTok, Reddit