Kyle Weiger
Share This
Going From Wall to Freestanding Handstand: Why You Can Hold Against the Wall But Can’t Balance in the Middle
“I can hold a wall handstand for 60 seconds, but the second I try freestanding I fall instantly. What’s going on?”
This is one of the most frustrating plateaus in handstand training. You’ve put in the work. You’ve built strength. You can hold against a wall with solid form for extended periods. You feel ready.
But when you kick up without the wall, you wobble for maybe half a second and immediately tip over. It feels like you’re starting from scratch, like all that wall work didn’t transfer at all.
Here’s what you need to understand: wall handstands and freestanding handstands are related skills, but they’re not the same skill.
The wall teaches you strength, alignment, and comfort being inverted. Those are essential foundations. But the wall can’t teach you balance. And if you’ve been using it wrong (relying on it for support instead of using it as a training tool), you may have actually been reinforcing patterns that make freestanding balance harder.
After coaching thousands of students through this exact transition, I can tell you that the gap between wall and freestanding is predictable, manageable, and absolutely crossable when you understand what’s actually different and how to bridge it.
Let me show you why the transition feels so hard and exactly how to make it.
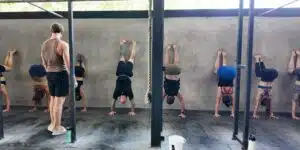
Why Wall Holds Don’t Automatically Equal Freestanding Balance
Let’s start by understanding what’s different between these two positions.
Wall handstands allow you to:
- Rely on the wall for stability (even if you think you’re not)
- Maintain a static position without making constant adjustments
- Build strength and endurance without requiring balance
- Feel secure and safe, which allows you to relax into the hold
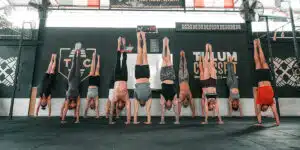
Freestanding handstands require you to:
- Actively balance through continuous micro-adjustments
- Respond to shifts in your center of mass in real time
- Find the balance point with no external reference or support
- Manage the fear and tension that comes with being unsupported
These are different neuromuscular demands. The strength you built against the wall is transferable. But the balance awareness and active control? That has to be developed separately.
This is why students can hold wall handstands for a minute but can’t hold freestanding for even 5 seconds. They have the strength. They’re missing the balance component entirely.
Problem #1: You’ve Been Using the Wall Wrong
Here’s the hard truth that most students don’t want to hear: if you can hold a wall handstand for 60 seconds but can’t balance freestanding at all, you’ve probably been using the wall as a crutch instead of a training tool.
What using the wall as a crutch looks like:
- Kicking up with heavy contact on the wall
- Pushing into the wall throughout the hold
- Using the wall to prevent any movement or instability
- Never practicing moments of minimal or zero wall contact
When you do this, you’re not learning to balance. You’re learning to hold a supported position. The wall is doing the balance work for you.
What using the wall as a training tool looks like:
- Controlled entries with minimal wall contact (heels barely touching)
- Active practice of shifting weight on and off the wall
- Deliberate moments of pulling away from the wall slightly
- Treating the wall as backup safety, not primary support
If you’ve been in the first camp for months, your wall time hasn’t been preparing you for freestanding. It’s been teaching you to depend on external support.
This isn’t your fault if no one taught you the difference. But it does mean you need to change how you use the wall going forward.
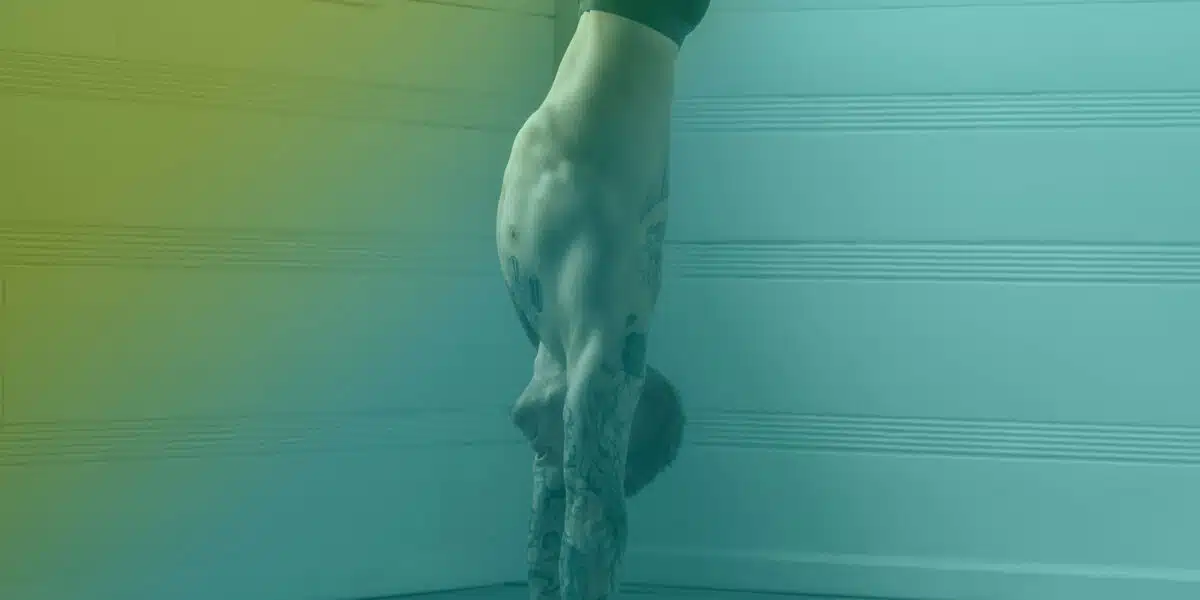
Problem #2: You Don’t Know What the Balance Point Feels Like
The balance point in a handstand is a small range where your center of mass is directly over your base of support (your hands). Stay in that range, and you’re balanced. Drift outside it, and you fall.
Against the wall, you never have to find this range. The wall keeps you “balanced” even when your weight distribution is nowhere near the actual balance point.
So you can hold for a minute against the wall, but you have zero proprioceptive awareness of where the balance point actually lives. When you try to go freestanding, you’re searching for something you’ve never felt before.
It’s like trying to hit a target you’ve never seen. You might get lucky occasionally, but you can’t do it consistently because you don’t know what you’re aiming for.
The fix: practice feeling the balance point while you still have the wall as safety.
Back-to-wall handstands where you deliberately pull your heels away from the wall for brief moments. You’ll feel yourself start to tip, and you’ll tap the wall to catch yourself. Do this repeatedly, and you start to learn where the balance point is.
Weight shifts against the wall where you practice moving your center of mass forward and back, feeling how finger pressure and shoulder position affect your balance. This teaches you the micro-adjustments you’ll need freestanding.
Gradually reduce wall contact over weeks until you’re holding with heels hovering an inch away from the wall. You’re balancing at this point. The wall is just psychological safety.
This progression bridges the gap between supported and unsupported. You’re learning balance while you still have a safety net.
Problem #3: Your Entry is Setting You Up to Fail
How you enter your handstand determines the position you land in. And if your entry is uncontrolled, you’re arriving nowhere near the balance point.
Most students transitioning from wall to freestanding kick up with the same momentum they use for wall handstands. That momentum is designed to get you to the wall. It overshoots the balance point by definition.
When you remove the wall, that same entry sends you flying past vertical. You never had a chance to balance because you never arrived at the balance point in the first place.
The solution: learn a freestanding-specific entry.
Stand closer to where your hands will be (reduces momentum needed). Kick up gently, aiming to barely reach vertical (not blow past it). Focus on your hips arriving directly over your shoulders (not flying past them). Practice this entry 10 times in a row with the wall nearby as backup, focusing on consistency and control.
A controlled entry that arrives at the balance point gives you a fighting chance to actually balance. A wild entry that overshoots guarantees you’ll fall immediately.
Problem #4: You’re Too Tense to Make Balance Corrections
Here’s a pattern I see constantly: students finally kick up to a freestanding handstand, panic because there’s no wall, and immediately lock up every muscle in their body.
Their hands go rigid. Their shoulders freeze. Their core locks into maximum tension. And then they fall because they can’t make any adjustments.
Balance requires movement. You need to be able to shift weight through your fingers, make small changes in shoulder position, breathe and adjust. Rigid tension prevents all of that.
This tension response is fear-based. The wall felt safe, so you could relax (relatively). Freestanding feels dangerous, so your nervous system goes into fight-or-flight and locks everything down.
The fix: practice staying relaxed enough to move while inverted.
Start with wall holds where you consciously breathe and stay as relaxed as possible while maintaining the position. This teaches your nervous system that being inverted doesn’t require maximum tension.
Practice brief freestanding attempts (even 1-2 seconds) where your only goal is to stay loose enough to make adjustments. Not to hold longer, just to not freeze up.
Film yourself. Watch how your body responds when you go freestanding versus against the wall. You’ll probably see obvious tension differences. Work on reducing that gap.
Over time, as freestanding becomes more familiar, the panic response decreases and you can actually use your balance system instead of fighting your own tension.
Problem #5: You Haven’t Put in Enough Freestanding Attempts
This one is simple but important: wall practice builds strength and alignment. Freestanding practice builds balance.
They’re separate skills that require separate practice.
If you’ve spent three months doing exclusively wall handstands, you’ve built great strength and endurance. But you have maybe 10 total attempts of actual freestanding balance practice. That’s not enough for your nervous system to develop the motor patterns it needs.
Balance is a skill learned through repetition. Your nervous system needs hundreds (maybe thousands) of attempts to calibrate the micro-adjustments that create stability.
The fix: include freestanding attempts in every session.
Even if you can only hold for 1-2 seconds right now, do 5-10 attempts per session. Quality attempts where you’re focused and intentional, not just wildly kicking up hoping for magic.
Over weeks, those attempts accumulate. Your nervous system collects data. The balance point starts to feel more familiar. What felt impossible starts to feel achievable.
But this only works if you actually practice freestanding regularly. You can’t build freestanding balance by doing exclusively wall work.
The Transition Protocol That Actually Works
Here’s the progression I use with students to bridge from wall to freestanding:
Phase 1: Learn to Use the Wall Correctly (2-4 Weeks)
- Practice back-to-wall holds with minimal contact
- Work on controlled entries that arrive gently at the wall
- Build time under tension (30-60 second holds with good form)
- Goal: Wall is backup, not primary support
Phase 2: Practice Moments Off the Wall (2-4 Weeks)
- Pull heels away from wall for 1-2 seconds at a time
- Practice weight shifts to feel where the balance point is
- Gradually increase time with heels hovering off the wall
- Goal: Experience brief moments of actual balance
Phase 3: Develop Controlled Freestanding Entries (2-4 Weeks)
- Practice entries designed to arrive at balance point, not overshoot it
- Do 5-10 controlled entry attempts per session
- Use wall nearby as psychological safety, not physical support
- Goal: Consistent, repeatable entries to the right position
Phase 4: Build Freestanding Hold Time (Ongoing)
- Start catching 2-3 second balances consistently
- Work up to 5 seconds, then 10, then 15
- Continue wall work for strength and endurance in parallel
- Goal: Reliable freestanding holds building toward 30+ seconds
Each phase builds on the previous one. You don’t skip steps. You don’t rush to the next phase before you’ve established competency in the current one.
Timeline expectations:
If you follow this progression with 3-4 practice sessions per week, expect 2-4 months to go from “wall only” to “reliable 10-second freestanding holds.”
This feels slow compared to the “just kick up and try” advice you see online. But it’s faster than spending six months kicking up randomly with no progress because you skipped the bridging work.
Common Mistakes In Going From The Wall To Freestanding Handstand
Mistake #1: Abandoning wall work completely
Some students think they need to quit the wall entirely to “force” themselves to learn freestanding. Bad idea. The wall is still valuable for building endurance and practicing alignment. Just use it correctly.
Mistake #2: Attempting freestanding only when “feeling confident”
Your confidence will build through practice, not before it. If you wait until you feel ready, you’ll never start. Practice even when you’re nervous.
Mistake #3: Practicing only high-volume wall holds
Holding against the wall for 90 seconds doesn’t teach you freestanding balance. You need specific freestanding practice, not just more wall time.
Mistake #4: Giving up after a few failed attempts
The first 50-100 freestanding attempts are data collection. You’re supposed to fall a lot. That’s how you learn where the balance point is. Don’t interpret early failure as evidence you can’t do it.
Mistake #5: Not filming yourself
You cannot see what you’re actually doing while inverted. Film from the side. Watch how you enter, where your weight goes, how you respond to imbalance. Adjust based on what you see.
The Mental Shift Required
Beyond the physical skills, there’s a mental component to going from the wall to freestanding handstand.
Wall handstands feel safe. Controlled. Predictable. You know you won’t fall. This allows your nervous system to relax.
Freestanding handstands feel risky. Unpredictable. You might fall (you probably will, many times). This activates fear and tension.
Part of the transition is learning to be okay with the uncertainty.
You have to accept that you’ll fall. A lot. And that falling is part of the process, not a sign of failure. The students who make this transition successfully are the ones who can stay calm and curious in the face of repeated falls.
“That time I went too far forward. Next time I’ll adjust.” Not: “I’m terrible at this and I’ll never get it.”
The mental game matters as much as the physical skills.
The Bottom Line: Wall and Freestanding Are Different Skills
You can hold against the wall but can’t balance freestanding because they’re different skills with different demands.
The wall builds strength, alignment, and comfort. Freestanding requires active balance, proprioceptive awareness, and the ability to make constant micro-adjustments.
You need both. Wall work creates the foundation. Freestanding practice builds the balance on top of that foundation.
But you can’t skip the bridging work. Learn to use the wall correctly (minimal contact, moments of balance). Develop controlled entries. Practice freestanding regularly even when it’s frustrating. Give your nervous system the repetitions it needs to learn.
Do this systematically, and the gap between wall and freestanding closes steadily. What felt impossible starts to click. The balance point becomes familiar instead of mysterious.
It takes time. It takes consistent practice. It takes patience with the process.
But it absolutely works.
Ready to Make the Transition?
If you want systematic progression from wall to freestanding with clear benchmarks and proper bridging work (not just “keep trying and hope for the best”), I’ve built a complete system for exactly that.
[Check out my 8 Week Freestanding Protocol course] for structured training that takes you from wall work through confident freestanding holds.
Or start with the fundamentals:
[Download my free 21 Foundational Handstand Habits series](your link)
These habits include the progression principles and practice strategies that make the wall-to-freestanding transition systematic instead of random.
You’ve built the strength. Now build the balance. The gap is crossable. Let’s cross it together.
PS: Follow me on socials: Instagram, Facebook, TikTok, Reddit