Kyle Weiger
Share This
How To Fix Banana Back in Handstands: Why You Keep Arching (And How to Stop)
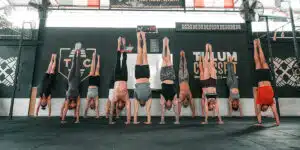
Look at any gym, yoga studio, or CrossFit box and you’ll see the same thing: students kicking up into handstands with massive arches in their shape, most of them wondering how to fix banana back so they can have a cleaner mechanical stack.
The “banana back” is the most common handstand compensation pattern I see. And it’s not just an aesthetic issue. That arch is actively limiting your balance, creating unnecessary strain on your lower back, and preventing you from developing real skill.
After coaching thousands of students over the past decade, I can tell you this: you’re not arching because you’re weak or inflexible. You’re arching because of specific, fixable technical issues.
Let me break down exactly why you keep arching and how to actually fix it.
What’s Actually Happening When You Arch
First, let’s be clear about what we’re talking about.
A “banana back” means excessive extension (arching) in your lumbar spine when you’re inverted. Instead of a straight line from your wrists through your hips to your ankles, you have a pronounced curve. Your hips push forward, your lower back compresses, and your legs trail behind.
This isn’t just about aesthetics or Instagram-worthy lines. Here’s what that arch is actually doing:
It shifts your center of mass away from your base of support. When you arch, your hips and legs move forward relative to your hands. Now you’re trying to balance a curved shape instead of a vertical line. Significantly harder.
It creates compression in your lower back. That hyperextension puts pressure on your lumbar vertebrae and discs. Do this for months, and you’re setting yourself up for chronic lower back pain.
It limits your endurance. An arched position requires constant muscular effort to maintain. You’re fighting your own misalignment instead of using skeletal stacking to support your weight efficiently.
It becomes your default pattern. Your nervous system learns what you practice. If you practice banana back handstands for six months, that becomes what a handstand feels like to your body. Fixing it later requires completely retraining your proprioceptive awareness.
So why does this happen in the first place?
Reason #1: Your Shoulders Aren’t Open Enough
This is the biggest culprit, and it’s often missed by coaches who don’t understand the mechanics.
Here’s the chain reaction:
You try to get your arms overhead into a handstand position, but your shoulders don’t have the flexibility to go fully vertical. Your shoulder joint can only flex so far before it hits its limit.
But you’re committed to the handstand. You’re already inverted. Your arms need to be overhead somehow.
So your body finds a compensation: it arches your lower back.
By dumping into lumbar extension, your body can get your arms into what looks like an overhead position without actually requiring full shoulder flexion. Your shoulders stay relatively closed, and your back picks up the slack.
You’re not choosing to arch. Your body is solving a mobility problem with a compensation pattern.
This is why flexibility work matters. Not extreme contortionist flexibility. Just functional shoulder flexion that allows your arms to go truly vertical without forcing your spine to compensate.
Reason #2: Your Ribs Are Flaring
Even if you have adequate shoulder mobility, you can still arch if you don’t understand rib position.
When your ribs flare (meaning your lower ribs stick out and up), your lower back automatically goes into extension. It’s a mechanical relationship. Flared ribs equal arched back.
Most students have never been taught to pay attention to their ribs. They kick up thinking about their arms, their legs, their balance. Meanwhile, their ribs are jutting out and dragging their lower back into hyperextension.
The cue that fixes this: “Pull your ribs down and in.”
Think about the position your torso makes in a hollow body hold. That’s the shape you want. Ribs pulled down toward your hips, core engaged, lower back flat (or even slightly rounded).
This rib position is what allows you to maintain a straight line instead of an arch. Without it, you’re fighting a losing battle.
Reason #3: Disengaged Core
Your core’s job in a handstand is to prevent your lower back from arching. It’s an anti-extension function.
If your core isn’t strong enough or isn’t actively engaged, gravity and the physics of being inverted will pull you into extension. Your lower back becomes the path of least resistance.
Here’s the test: can you hold a solid hollow body hold on the ground for 30+ seconds?
If not, you don’t have the core strength to maintain a straight handstand line yet. You need to build that capacity before expecting it to show up when you’re inverted.
But even if you have the strength, you still need to actively engage it. I see students with plenty of core strength who arch in handstands because they’re not thinking about their core. They’re focused entirely on balance and forget to brace.
Your core needs to be engaged from the moment you kick up until the moment you come down. Not as an afterthought, but as a primary component of the position.
Reason #4: You’re Kicking Up With Too Much Momentum
The way you enter your handstand can set you up for success or doom you to banana back from the start.
When students kick up with excessive momentum, they often overshoot vertical. To avoid falling over, their body instinctively arches to pull their center of mass back.
Now they’re “balanced” in a banana shape. And because that’s how they entered every single time, their nervous system thinks that’s what a handstand is supposed to feel like.
A controlled entry solves this.
When you kick up with just enough momentum to reach vertical (not blow past it), you can arrive in a stacked, straight position. Your body doesn’t need to arch as a compensation for overshooting.
This is why I’m so adamant about students learning controlled kick-ups instead of wild, hope-for-the-best entries. The quality of your entry determines the quality of your handstand.
Reason #5: You’ve Never Been Taught What “Straight” Feels Like
This might sound obvious, but most students genuinely don’t know what a straight handstand is supposed to feel like from the inside.
They’ve seen pictures. They know intellectually what it should look like. But they’ve never experienced that alignment in their own body with proper coaching feedback.
So they kick up, think they’re straight, and are actually in a massive arch. They have no internal reference point for what correct alignment feels like.
This is where coaching and video feedback become essential.
A coach can tell you in real time: “Your ribs are flaring, pull them down.” “Your hips are pushing forward, tuck your pelvis slightly.” “You’re in a banana, think about making one straight line.”
Video allows you to see what you’re actually doing versus what you think you’re doing. The gap between these two is often enormous for beginners.
Without external feedback, you’re practicing blind. You could be reinforcing an arch for months without even knowing it.
How to Actually Fix Your Banana Back
Knowing why you arch is step one. Here’s step two: the actual fixes.
Fix #1: Work on Shoulder Mobility
If limited shoulder flexion is causing your arch, you need to address it directly.
Exercises that help:
- Wall shoulder flexion stretches (hands on wall, walk feet back, sink chest toward floor)
- Foam roller shoulder openers (lying on roller lengthwise, arms overhead)
- Resistance band shoulder stretches
- Consistent practice of overhead positioning
The goal isn’t contortionist flexibility. You just need enough range to get your arms vertical without your lower back compensating.
Do this work consistently (daily is ideal), and you’ll see improvement in weeks, not months.
Fix #2: Learn to Control Your Ribs
This is often a cue issue more than a strength issue.
Practice rib awareness:
- Hollow body holds on the ground (this is the rib position you want)
- Wall handstands with conscious focus on pulling ribs down
- Breathing exercises where you exhale fully and feel your ribs pull in
The cue I use: “Imagine someone’s about to punch you in the stomach. Brace your core and pull your ribs down to protect yourself.”
That bracing, ribs-down feeling is what you need to maintain in your handstand.
Fix #3: Build Real Core Strength
If your core is the weak link, strengthen it specifically for handstands.
Key exercises:
- Hollow body holds (working up to 60 seconds)
- Plank variations with posterior pelvic tilt (actively rounding your lower back slightly)
- Dead bugs (teaching core stability while moving limbs)
- Compression work (bringing knees to chest, building the strength to keep hips stacked)
Your core should be strong enough to hold a hollow position easily before you expect it to maintain that position while inverted.
Fix #4: Practice Controlled Entries
Stop kicking up like you’re trying to launch yourself to the moon.
Drill this:
- Stand closer to where your hands will be (reduces the momentum needed)
- Kick with control, aiming to barely reach vertical (not overshoot it)
- Think about your hips arriving directly over your shoulders
- Practice this 10 times in a row, focusing on the quality of the entry
A controlled entry sets you up in proper alignment. A wild entry sets you up in a banana.
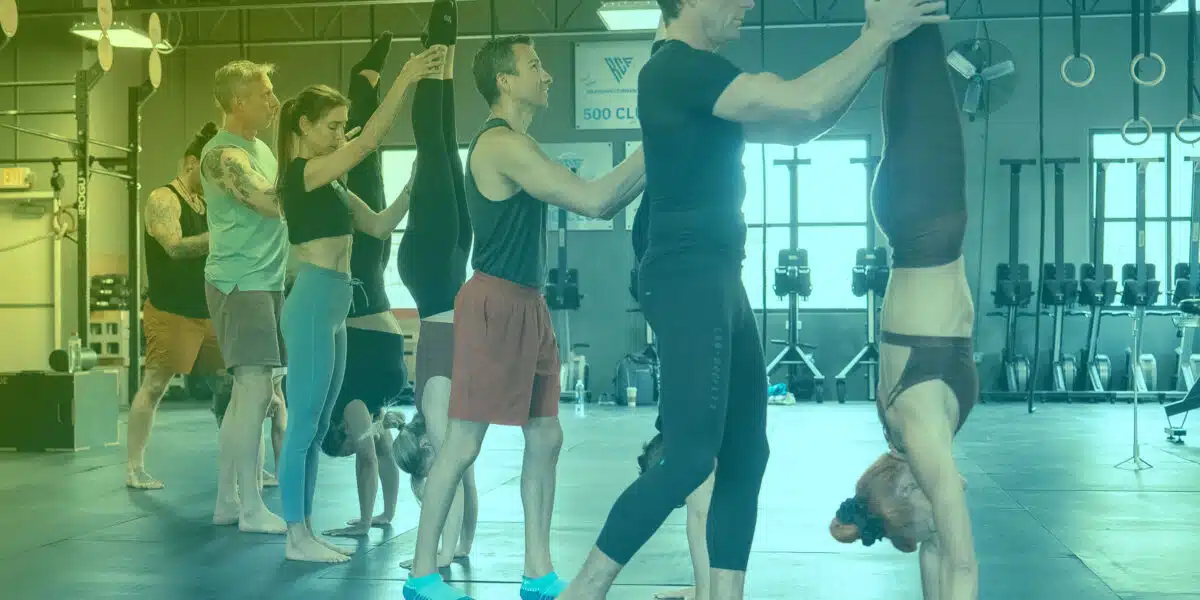
Fix #5: Use the Wall Intelligently
The wall is your best tool for learning what straight feels like.
Chest-to-wall handstands are especially useful here.
Face the wall, hands a few inches away, walk your feet up. In this position, you physically cannot arch (the wall prevents it). This forces you to engage your core and find a straight line.
Hold this position. Feel what it requires. Notice where your ribs are, how your core feels, where your shoulders sit. This is the reference point you need to recreate freestanding.
Practice chest-to-wall holds regularly, and your nervous system will start to internalize what “straight” actually feels like.
Fix #6: Get Video Feedback Constantly
Film yourself. From the side. Every session.
You will be shocked at the gap between what you think you’re doing and what you’re actually doing once you learn how to fix banana back.
Use the video to check:
- Is your spine straight or arched?
- Are your ribs flaring or pulled down?
- Are your shoulders open or closed?
- Is your overall line vertical?
Adjust based on what you see. Film again. Repeat.
This feedback loop accelerates progress faster than anything else because you’re working with accurate information instead of your (often incorrect) internal sense of where you are in space.
The Timeline: How Long Does It Take to Fix?
If you’ve been practicing banana back handstands for months, retraining the pattern takes time. Your nervous system has learned that arch. You need to teach it something new.
Realistic timeline:
If you address mobility limitations, practice with proper alignment cues, and use video feedback consistently, you can see significant improvement in 4-8 weeks.
The arch won’t disappear overnight. But you’ll notice it getting less pronounced. Your holds will start to feel more stable. Your lower back will stop hurting.
After 3-6 months of conscious practice with proper alignment, a straight handstand will start to feel natural instead of forced.
The key is consistency and not reverting to old patterns. Every time you practice a banana back, you’re reinforcing the old pattern. Every time you practice straight, you’re building the new one.
The Bottom Line: It’s Fixable, But You Have to Address the Cause
You keep arching in your handstand because of specific, identifiable reasons: limited shoulder mobility, flared ribs, weak or disengaged core, poor entry mechanics, or lack of awareness about what straight actually feels like.
The banana back isn’t a permanent condition. It’s a pattern you learned, and you can unlearn it.
But you can’t just learn how to fix banana back it by just “trying not to arch.” You have to address the underlying causes, build the mobility and strength you’re missing, retrain your entry mechanics, and give yourself consistent feedback about what you’re actually doing.
Do this work, and you’ll build a handstand with a clean line that’s more stable, more sustainable, and significantly less likely to cause you chronic back pain.
Stop practicing the arch. Start practicing the straight line.
Ready to Fix Your Alignment?
If you want systematic training that teaches proper alignment from day one (and helps you fix compensation patterns like banana back before they become ingrained), I’ve built a complete system for that.
[Check out my 4 Essential Elements course] for training that addresses mobility, strength, and technique in the right order.
Fix the arch. Build the straight line. Your lower back (and your handstand) will thank you.
PS: Follow me on socials: Instagram, Facebook, TikTok, Reddit